
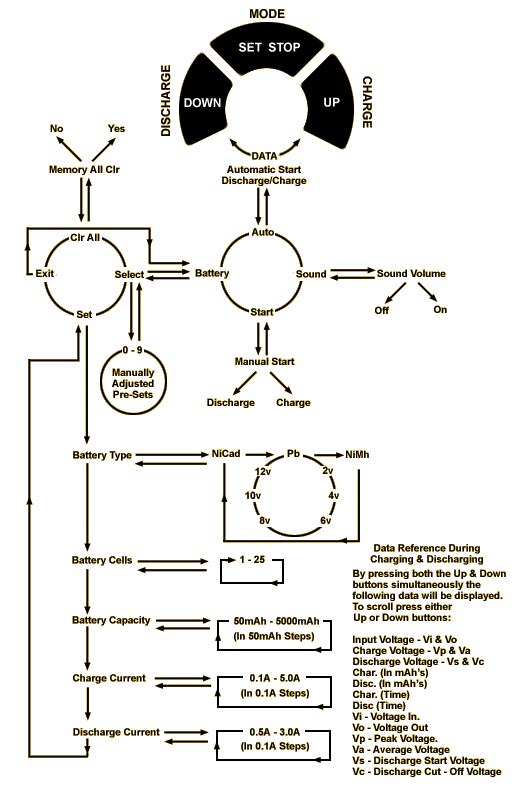
| Confused By The Super Nova 250s Instructions? |
Then this schematic diagram may help you find your way around all the functions of this great charger/discharger. Use the drawing below with your instruction leaflet to get the best from your charger. This diagram can be downloaded in several formats from our 'Downloads' page

©
Flying Sites - The R/C Aero Portal